Sealing grout properly is crucial for maintaining the beauty and longevity of your tiled surfaces. If you don’t take the right steps, stains can quickly become a problem, compromising your clean look. Knowing how to prepare your grout and apply a sealer can make all the difference. Let’s explore the best practices to ensure your grout stays protected and looking fresh for years to come.
Understanding Grout and Its Vulnerabilities
While grout is essential for holding tiles together and providing a finished look, it’s not invincible. Over time, your grout can absorb moisture, dirt, and stains, leading to discoloration and damage.
This porous material can allow mold and mildew to thrive if not properly maintained. You might notice that high-traffic areas or wet environments, like kitchens and bathrooms, are particularly vulnerable to wear and tear.
Regular cleaning is crucial, but it’s not enough to protect your grout fully. You’ll want to be proactive about sealing it to prevent water and grime from penetrating.
Understanding these vulnerabilities will help you take the right steps to maintain its integrity and keep your tiled surfaces looking fresh and clean.
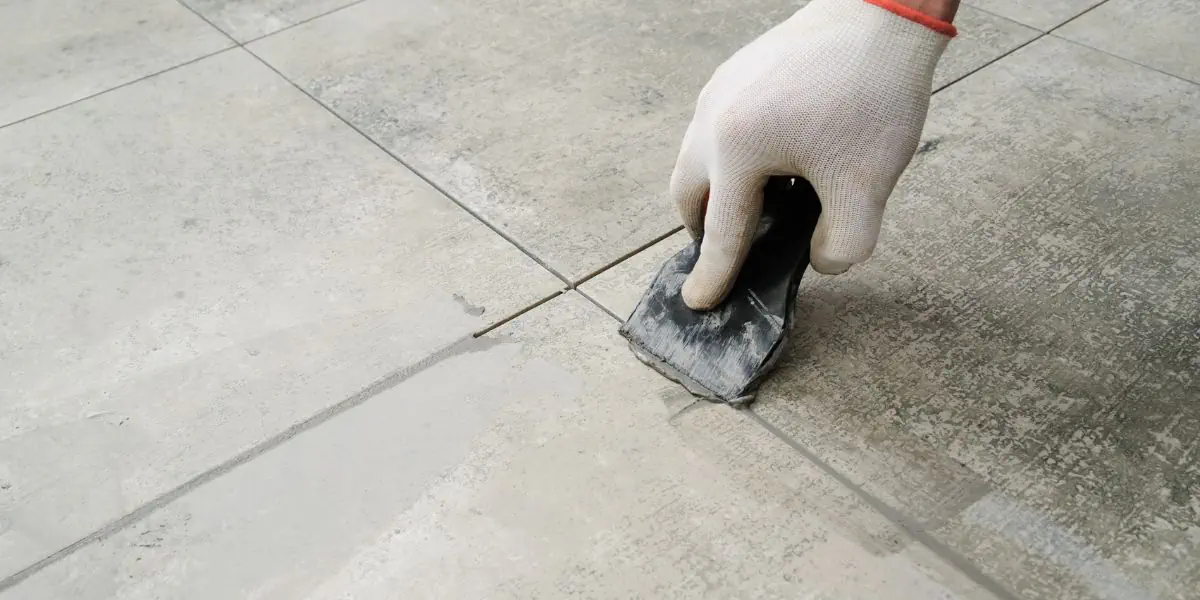
Preparing Your Grout for Sealing
Before sealing your grout, it’s crucial to prepare it properly to ensure the best results.
Start by cleaning the grout lines thoroughly. Use a grout cleaner or a mixture of vinegar and water to remove dirt, grime, and any existing stains. Scrub the lines gently with a brush, making sure to get into all the crevices. Rinse well with clean water and let it dry completely—this step is vital.
If your grout’s been previously sealed, you might need to strip the old sealant. Once everything’s dry, inspect the grout for cracks or gaps; repair these with a grout repair caulk to prevent moisture from seeping in.
Preparing your grout properly sets the stage for effective sealing.
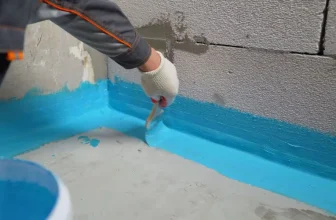
Step-by-Step Guide to Sealing Grout
With your grout clean and repaired, you’re ready to seal it effectively. First, choose a high-quality grout sealer suited for your type of grout.
Pour a small amount into a container for easy application. Using a small paintbrush or applicator, apply a thin layer of sealer over the grout lines, ensuring even coverage. Work in small sections to prevent the sealer from drying too quickly.
Allow it to sit for the time specified on the product instructions, usually around 5 to 10 minutes. Afterward, wipe off any excess sealer with a clean cloth.
Finally, let the grout cure for the recommended time before using the area. This method will ensure your grout is protected and looks great!
Tips for Maintaining Sealed Grout and Preventing Stains
To keep your sealed grout looking fresh and prevent stains, it’s essential to adopt a regular maintenance routine.
Start by sweeping or vacuuming the area weekly to remove dirt and debris that can cause discoloration. When it’s time to clean, use a pH-neutral cleaner and a soft brush to avoid damaging the grout. Always rinse thoroughly to prevent any residue buildup.
For spills, act quickly—blot, don’t rub, to minimize staining. If you notice areas starting to look dull, consider reapplying your grout sealer every year or as needed.
Lastly, avoid harsh chemicals and abrasive tools; they can wear down the sealant. With these simple steps, you’ll keep your grout looking great and protect it from stubborn stains.
Conclusion
By sealing your grout properly and keeping up with regular maintenance, you can protect it from stains and extend its lifespan. Remember to clean the grout lines before sealing and reapply the sealer annually for the best results. With just a little effort, you’ll keep your grout looking fresh and vibrant. Don’t forget to promptly clean up spills and use a pH-neutral cleaner to maintain that pristine appearance. Your tiles will thank you!
Trending Products