When it comes to achieving a flawless finish with color-matched silicone, the right approach makes all the difference. You need to pick the perfect shade that blends seamlessly with your surroundings. Once you’ve done that, preparing the surface correctly is crucial for a lasting application. But applying silicone isn’t as simple as it seems. Let’s explore the techniques that will elevate your results.
Choosing the Right Color-Matched Silicone
When you’re selecting the right color-matched silicone, it’s essential to consider both the project requirements and the intended aesthetic.
Start by assessing the colors in your space; you’ll want the silicone to seamlessly blend with existing elements. Look for color samples to ensure you get an accurate match.
Think about the finish as well; whether you prefer a matte or glossy look, the silicone should complement your surfaces.
Don’t forget about the application area—different environments may require specific formulations, like mold resistance for bathrooms.
Lastly, check the manufacturer’s recommendations for color options to ensure durability and longevity.
Preparing the Surface for Application
After choosing the right color-matched silicone, preparing the surface for application is key to achieving a professional finish.
Start by cleaning the area thoroughly. Remove any old silicone, dirt, or grease using a scraper or a suitable solvent. Make sure the surface is dry, as moisture can prevent proper adhesion.
If you’re working on porous materials, consider applying a primer to enhance bond strength. Once the surface is clean and dry, inspect it for any imperfections. Fill in cracks or gaps with an appropriate filler, ensuring a smooth base for the silicone.
Lastly, use painter’s tape to mask off adjacent areas. This’ll help you maintain sharp edges and prevent any mess during application.
Your preparation sets the stage for a flawless finish!
Techniques for Applying Silicone Seamlessly
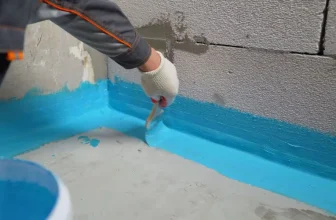
To ensure a seamless application of silicone, start by using a caulking gun for precise control.
Position the nozzle at a 45-degree angle to create a consistent bead. Apply steady pressure as you move along the joint, maintaining an even flow. Don’t rush; take your time to avoid gaps or excess.
If you’re working in corners, use a smaller nozzle to reach tight spaces effectively.
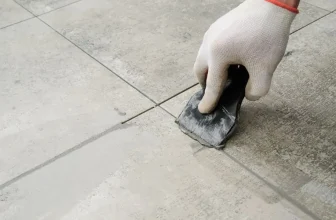
After applying the silicone, smooth it with your finger or a silicone smoothing tool. This helps eliminate any imperfections and blends the silicone with the surrounding surfaces.
Keep a damp cloth handy to wipe your finger or tool as you work to maintain a clean finish.
Tips for Blending and Finishing Touches
Achieving a flawless finish with color-matched silicone requires careful attention to detail. Start by smoothing the silicone with a wet finger or a silicone spatula, ensuring an even surface.
If you notice any uneven areas, don’t hesitate to add a bit more silicone and blend it in. To enhance the finish, consider using a small brush dipped in a compatible solvent to feather the edges. This helps to seamlessly transition the silicone into the surrounding surface.
Once you’re satisfied, allow the silicone to cure completely before exposing it to moisture or stress. Finally, clean any excess or smudged areas with a soft cloth for that pristine look.
These finishing touches can make all the difference in achieving a professional appearance.
Conclusion
By following these steps, you’ll achieve a flawless finish with color-matched silicone. Remember to choose the right shade, prepare your surface properly, and apply the silicone with care. Don’t rush the smoothing process, as those final touches make all the difference. Once it’s cured, admire your work and enjoy the professional look you’ve created. With a little patience and attention to detail, you’ll master the art of silicone application in no time!
Trending Products